Building (and racing) the JK Retro Chassis Kit
We are building a JK retro chassis so we have a car for an upcoming retro race. It is easier than we thought, but there are some gotchas that i wish we knew about before we started soldering. We'll not go through the step by step process, there are already good building articles on building a flat track chassis, by Mike Swiss from the IRRA how to page, and the Warmack chassis assembly instructions. There is guidance from assorted photos and suggestions from experienced builders.
We hope that the race in January will include a JK Spec Class race. It would also be great if there was a Flexi GT race, as we have a RTR car that i think meets those rules.
We will post photos of the final product.
First gotcha with the kit is that the main rail sockets are too narrow straight from the bag. We soldered the rail in with it resting in the narrow groves, but now we think we'll have to remove it, clean everything up, then open up the slots and put it in again so that it is flush with the pan.
We got a Pro Slot Euro Mk 1 motor with an American arm, but we see the IRRA rules for the JK Spec Class say only the Falcon 7 motor can be used (major bummer, those rules are killer). Perhaps we will practice with the Pro Slot and then race with the Falcon 7.
Front wheels we have are already too big for several of the bodies we wanted to use, they rub the underside of the body.
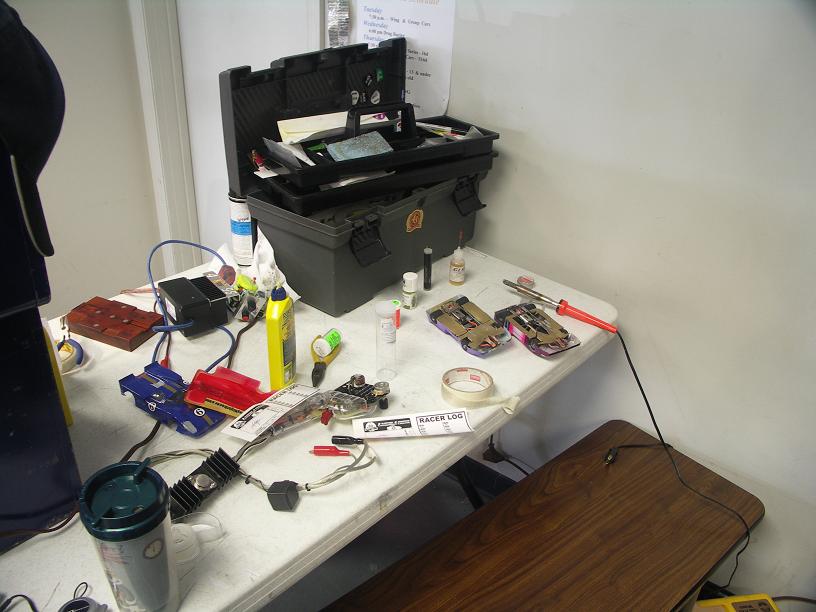
We do have a jig that we got for building drag cars, which helps to align things pergfetly (the engineer in me drives this frustrating perfextionism).
Dec 19, 2008
We just got most of the remaining parts - except for the body. We'll have to redo the main bars like i said above. Will probably shorten up the wheelbase from 4" to 3 3/4". It was suggested that we build for the Can-Am class instead of the JK spec class. Then we can use the Pro Slot motor, and change to Falcon 7 for the other classes. Too late to do work on it tonight, just got done shoveling the driveway.
Jan 8, 2009 - Happy Birthday to me
On Tuesday we widened the slots for the main bars and soldered them in so they are (nearly) flush with the bottom of the pan. We did shorten the wheelbase to 3 3/4". A little too much solder around the main bars but we're not going to worry about that now. We added support wires next to the front of the main rails and extending forward and bent out to the front fenders.
We also fit a piece of 3/32 ID x 1/8 OD brass tube inside the 1/8" crown gear for it to fit on the 3/32" rear axle. the tube was a tiny bit wide so we put it in the Dremel (which conveniently has a 1/8" chuck, and made it a bit thinner with 1000 grit sandpaper. Cut a slot in the tube for the set screw to reach from the gear to the axle. This was a good suggestion from Paul.
The rear part of the pan was a tiny bit wider than the 3.125" max chassis width allowed by the rules. We ground down the sides by 2/1000 of an inch so it's not too wide. [I got a digital caliper for Christmas so i can get these measurements right, hurray!]. Sure don't want to find out during tech inspection that something is not right.
With the main bars a little wider apart since the slots were widened toward the outside, the space between the bars and the side pans is a little tight for the 1/16" brass tubes to be used as hinges. We'll have to widen this out a bit by grinding the inside of the side pans.
I'm planning to go to the track tonight so i can get some racing in myself. Most Thursdays i'm busy but tonight i'll make an exception and do something fun.
Jan 10, 2009 - got 1/8" square brass tubing from local hobby store.
Jan 12, 2009 - Opened the space between the main rails and side pans.
Jan 13, 2009 - Manufactured the hinges and installed according to the instructions in Warmack article. Put on brass square tube on front ears behind wheels. Opened up pin tube holes in side pan with 1/8" drill, they are a tiny bit too tight to get the pin tubes in. Added front pin tube and wire from underneath front pin tube that travels into the square tube. Had to be careful to keep the wire level to get the maximum play inside the square tube. Put in the rear pin tubes, keeping them level.
To finish off the pin tubes, we hit the outside hole a very tiny bit with the 1/8" drill to get a chamfer around the hole. This does seem to make it easier to get pins in the hole.
Jan 17, 2009 - Dropped off body at Ian's for painting.
Jan 18, 2009 - (switched to Falcon 7 motor 'cuz apparently the race is GT Coupe, not Can-Am, which allows the more expensive 47,000 rpm Pro Slot Euro Mk 1 4002B). Also got some Teflon guide flag spacers.
Checked Falcon 7 motor for fit. Had to trim off about 1/8" from end of shaft to clear set screws in 28 tooth crown gear. The pinion needed to be forced on with a pinion pusher tool - which I knew we had and had to search the box of unfinished drag car parts for. The shaft is shorter than the Super 16D's that the tool is designed for, so we stuck an old wheel hub in, being careful not to bend the solder taps on the end of the motor.
I have such trouble soldering wires to the Falcon 7 tabs, the wires just plain fell off a factory built RTR car and I had trouble repairing that.
So we finally got the wires to the motor and attached the earring back to hold the wires to the front of the chassis, getting it so there was a nice natural centering effect for the guide flag.
Put in a bunch of spacers between the guide flag and chassis.
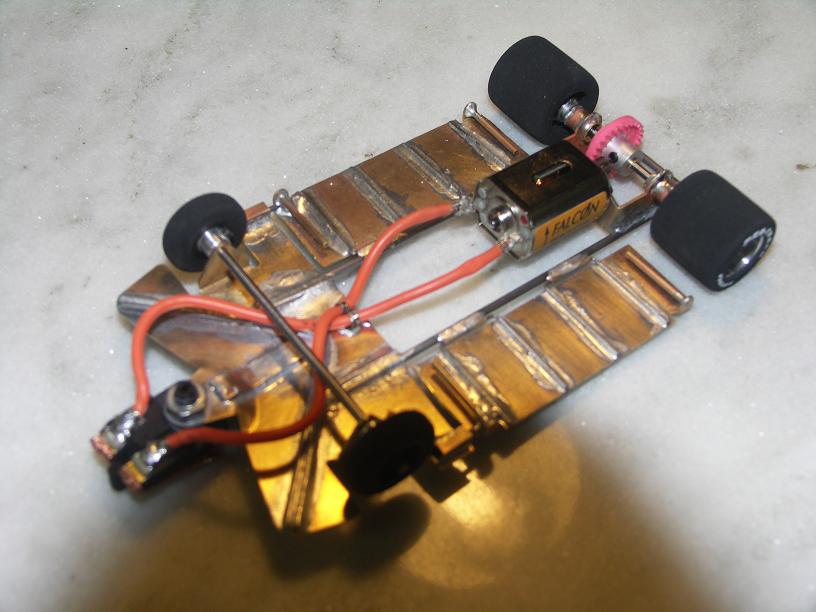
Jan 19, 2009 - First pictures of working product:
Still need to get the right front wheels. We got good fronts first, then traded them for ones a tiny bit smaller (0.771") in hopes of fitting under a body with very small front wheel wells. Well, the body still did not fit, and the front clearance was reduced to zero. Need to get the bigger ones (0.792") again so that there is the required clearance of 0.015"
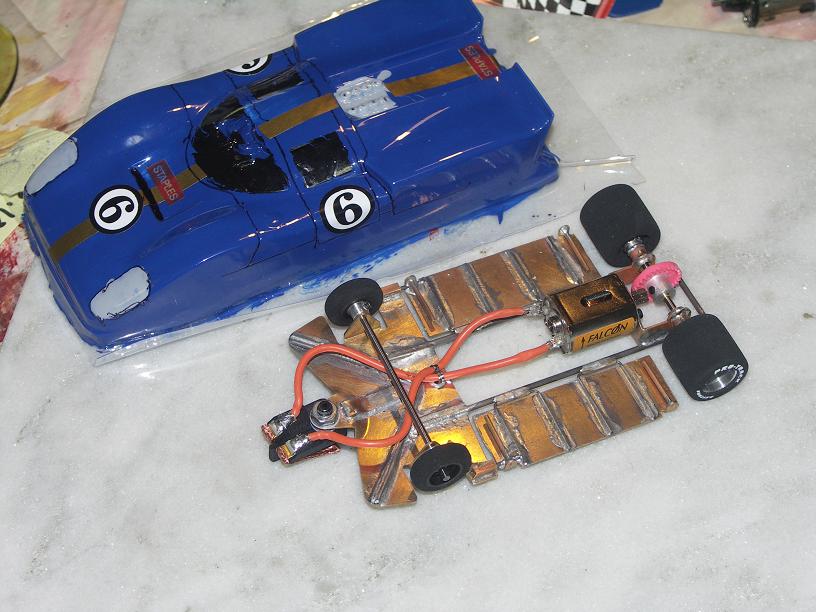
Jan 21, 2009 - Cut and mounted the blue body above. Added .007" bulletproofing in the inside around the pin holes. This is very important as the rear pin hole is so close to the wheel well.
Spent one hour testing car on track. Once at the track, had to change
the guide flag spacers again to push the flag down in the braid groove on the
track. It ran really good and stays in the slot well. The Falcon 7
motors have lots of brake.
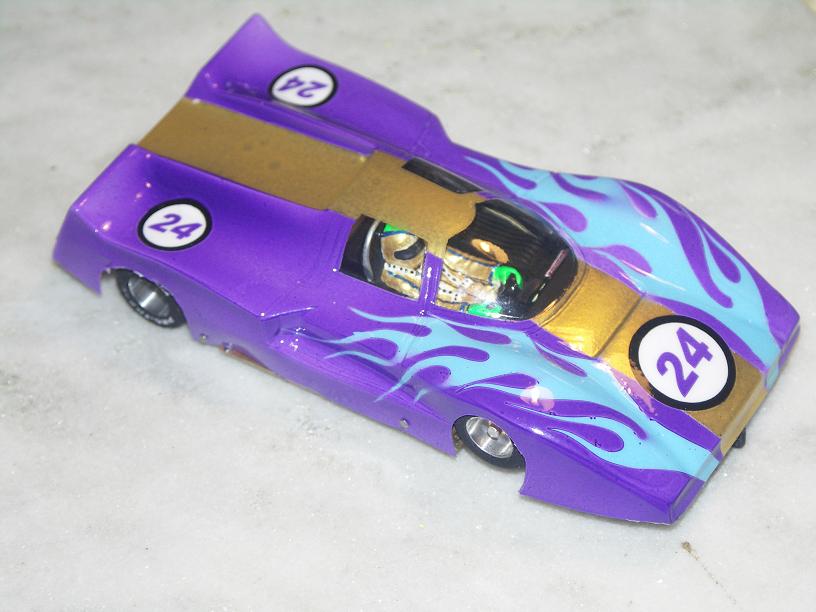
Jan 23, 2009 - Got the correct front wheels, spare gears (27 teeth) and other spare parts to have for race - don't want to have to buy stuff at the last minute. Ian brought the painted body to Friday Night Race, but did not have the driver, so we got one of the custom painted drivers (painted by John Marconi, I believe).
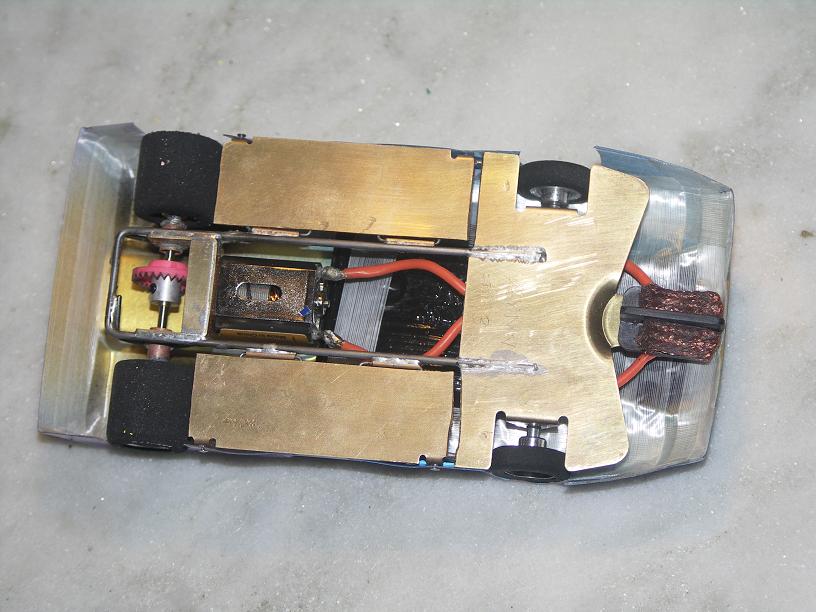
Jan 24, 2009 - mounted and bulletproofed the body from Ian. Thanks Ian, it really looks great! Added support to motor mount: piano wire from the back of the main rails, along the side of the motor mount, over the axle tube, and down to the cross piece on the back of the main rails. Went to track to practice. Paul put together an old car for me to race tomorrow, added more tape to that body. In practice the cars run exactly the same speed. The brass pinion was getting worn so we bought a steel one, did not put it on today.
Here is how the finished car looks:
After practice the rear axle was really tight, when we got home we had to tweak the right oilite to get it turning smooth again. I hope this does not become a problem in the middle of race. I added a clear spoiler to the Red Fox body for my car.
RACE DAY, Jan 25, 2009 -
Got to the raceway at 8:30AM and most of the table space was already taken
up. Practice with both cars went good. The brass push-on pinion
started to be intermittently loose, so we pulled it off and soldered on the
steel one. No problems with drivetrain after that.
We waited around forever for the F1 racing to be done and the GT Coupe to start. Both cars passed tech inspection! The one we built here was several grams overweight. The sign up sheet was very detailed, asking for wheel, flag, body manufacturers as well as motor and gearing.
Isaac got 3rd place concours, thanks again Ian for a great body. We put in two votes, so either someone else liked it too or two votes is enough to get third... He got two unpainted bodies and a cool black 'skull' carry bag.
Qualifying was a different story. I could not keep my car in the slot for a single clean lap -- very embarrassing. The car we built here did not de-slot once in qualifying - Isaac got a round of applause from all of the racers.
We qualified for the C-mains. Isaac came in second and I came in fourth out of 6. Isaac actually led for about half the laps, much to the amusement of the other racers. Only one racer from C-mains moved up to B-mains, so our racing was over for the day - Isaac played on the other tracks while the race finished.
See my page devoted to the race for more photos and video.
We finally left the track at 9PM.
Now we have to work on the Pinewood Derby car for Cub Scout race on Saturday...
I'll try to write a little more about this later.
So now we have 3 retro cars, the two on the left hand built, setup for GT
Coupe class, and the one on the right is Flexi GT class.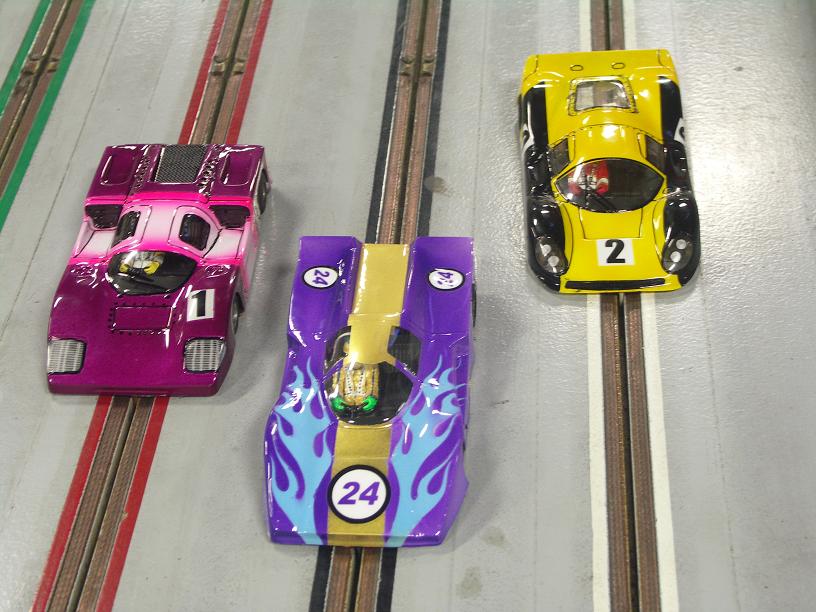 Definitely much cooler than a bunch of beat up wing cars!
This page was last updated 07/05/10